Tuesday
How to Disable Automatic Update on Windows 7
Do you like this story?
There are several reasons why some users do not like “Automatic Windows Update“, for example: the computer not connect o internet, the update process consumes some internet bandwidth and other. Windows update is recommended by Microsoft because by updating windows it will patch windows bug and increase windows security and stability.
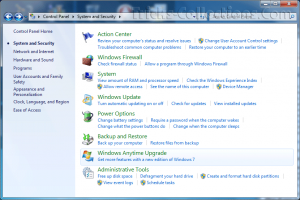
Usually on windows XP or previous version I disable automatic update from service in “Administrative tools” but on Windows 7 there no automatic update in the service. On windows 7 you can disable automatic update from “Windows Update” section in “System and Security”.
To Disable Automatic Update on Windows 7 follow these steps:
To Disable Automatic Update on Windows 7 follow these steps:
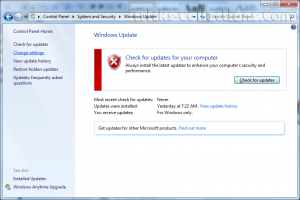
- Open control panel (click start orb then click control panel). Click “system and security” then click Windows Update

- In the left pane, click “Change settings”

- To disable Windows 7 automatic update, under “Important updates” change the options to “Never check updates” then click Ok to save the setting

Subscribe to:
Post Comments (Atom)
0 Responses to “How to Disable Automatic Update on Windows 7”
Post a Comment